1. Install Oracle IDK (latest version -- 1.8.0_122)
2. download Play with Activator (last version -- Activator 1.3.12 including Play 2.5.10)
https://www.playframework.com/download
3. download Scala IDE (last version 4.5.0) - The bundle contains the lastest release version of the Scala IDE for Eclipse and it comes pre-configured
for optimal performance
http://scala-ide.org/download/sdk.html
4. Setting Play by add the following into PATH
- activator-dist-1.3.12\bin
5. Setting JAVA_HOME
- Java\jdk1.8.0_112\bin
6. Setting sbteclipse : https://github.com/typesafehub/sbteclipse
- add global file (for version 0.13 and up) at ~/.sbt/0.13/plugins/plugins.sbt
- content: addSbtPlugin("com.typesafe.sbteclipse" % "sbteclipse-plugin" % "5.0.1")
7. Go to user worksapce (ex. PlayWorkspace), the create new project
- [...]$ activator new
- [...]$ select play_java
- [...]$ type name of project, ex. DemoPlayJava
- [...]$ cd DemoPlayJava
- [...]$ activator ui (for using web browser to manage the project)
- [...]$ create eclipse project by: activator clean compile eclipse
Now can opem ScalaIDE and import the DemoPlayJava project without any error like:
https://github.com/scala-ide/scala-ide-play2/issues/215
Read book: Play for Java cover 2
Thursday, 15 December 2016
Monday, 3 October 2016
Fast download tools for ubuntu
https://aria2.github.io/
aria2 is a lightweight multi-protocol & multi-source command-line download utility. It supports HTTP/HTTPS, FTP, SFTP, BitTorrent and Metalink. aria2 can be manipulated via built-in JSON-RPC and XML-RPC interfaces.
$ sudo apt-get install aria2
Usage Examples
Command-line scares you off? No, aria2 is really easy to use!!
Download from WEB:
$ aria2c http://example.org/mylinux.iso
Download from 2 sources:
$ aria2c http://a/f.iso ftp://b/f.iso
Download using 2 connections per host:
$ aria2c -x2 http://a/f.iso
BitTorrent:
$ aria2c http://example.org/mylinux.torrent
BitTorrent Magnet URI:
$ aria2c 'magnet:?xt=urn:btih:248D0A1CD08284299DE78D5C1ED359BB46717D8C'
Metalink:
$ aria2c http://example.org/mylinux.metalink
Download URIs found in text file:
$ aria2c -i uris.txt
Wednesday, 21 September 2016
Loading Wikipedia in to ElasticSearch
http://blog.novelessay.com/post/loading-wikipedia-in-to-elasticsearch
This article gives instructions for loading Wikipedia articles in to ElasticSearch. I did this on Windows, but all of these steps should work on any java friendly platform.

This article gives instructions for loading Wikipedia articles in to ElasticSearch. I did this on Windows, but all of these steps should work on any java friendly platform.
- Download ElasticSearch
- Download stream2es
- Download Wikipedia articles
- Start ElasticSearch
- Run stream2es
Download ElasticSearch
Go to Elastic.co and download ElasticSearch here: https://www.elastic.co/downloads/elasticsearch
Download and unzip the elasticsearch download in to a folder of your choice.
Download stream2es
Go here and download the stream2es java jar file: http://download.elasticsearch.org/stream2es/stream2es
Optional: See stream2es on github for options: https://github.com/elastic/stream2es
Download Wikipedia articles
Go here and download the wikipedia article archive: https://dumps.wikimedia.org/enwiki/latest/
There are many options, but the specific one I downloaded was this: enwiki-latest-pages-articles.xml.bz2
(It's over 12GB, so be sure you have plenty of disk space.)
Start ElasticSearch
I'm on Windows, so I opened a command window and ran this:
c:\elasticsearch-1.5.2\bin\elasticsearch.bat
That starts up your local ElasticSearch instance at localhost:9200
Run stream2es
- Move the stream2es file to your ElasticSearch bin folder. I put stream2es here c:\elasticsearch-1.5.2\bin\
- Move the Wikipedia archive (enwiki-latest-pages-articles.xml.bz2) to your ElasticSearch bin folder too.
- Run the stream2es java file:
C:\elasticsearch-1.5.2\bin>java -jar stream2es wiki --target http://localhost:9200/mywiki --log debug --source /enwiki-latest-pages-articles.xml.bz2
Notes:
- You can change the "mywiki" to whatever you want your specific ElasticSearch index name to be.
- I had some trouble getting stream2es to find my wikipedia archive path on Windows, but the / in front of the file name worked.
I
ran this all local on my Windows desktop, and it took 6-8 hours. It
appears to be locked up near the end, but it did eventually exit.
Now, you should have over 16 million Wikipedia articles loaded in to your local ElasticSearch index. Enjoy.
Tuesday, 20 September 2016
Running TensorFlow on window 7
http://www.netinstructions.com/how-to-install-and-run-tensorflow-on-a-windows-pc/
If you're involved with machine learning, you probably
heard the news by now that Google open-sourced their machine learning
library TensorFlow a few weeks
ago. Excited to dive into TensorFlow, I went to their download and
installation page and was disappointed to discover they didn't offer any
support or instructions for Windows users.
But they did have a Docker image! In case you haven't heard, Docker is a container that wraps up a piece of software in a complete filesystem that contains everything it needs to run: code, runtime, system tools, and system libraries. And Docker is available on Windows.
(A quick aside -- As of June 2016 it looks like you can use Docker Toolbox for Windows for Windows Windows 7 or 8 and the newer, currently in beta Docker for Windows for Windows 10. Note the absence of the word 'Toolbox' if you are using Windows 10. Docker is confusing.
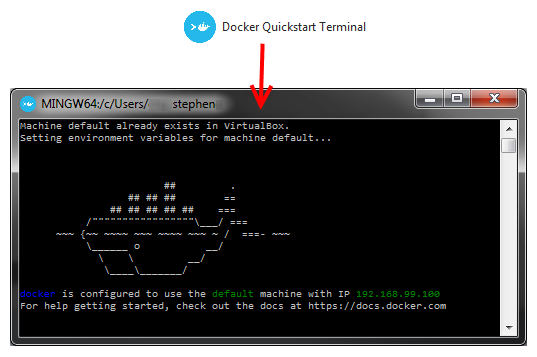
Then I opened up the Docker Quickstart Terminal.
It created a default Docker machine for me. You can view the Docker machines available by typing
You exit twice, first to get out of root access, and second to get out of the docker container.
Now if you type
Okay, now the Docker machine called 'vdocker' has been created and configured. Now to actually install TensorFlow. Open a Windows cmd prompt (not the Docker terminal) and enter the following:
FOR /f "tokens=*" %i IN ('docker-machine env --shell cmd vdocker') DO %i
You should see some output from the Docker machine like the following screenshot
Then type the following line (from the Docker install page):
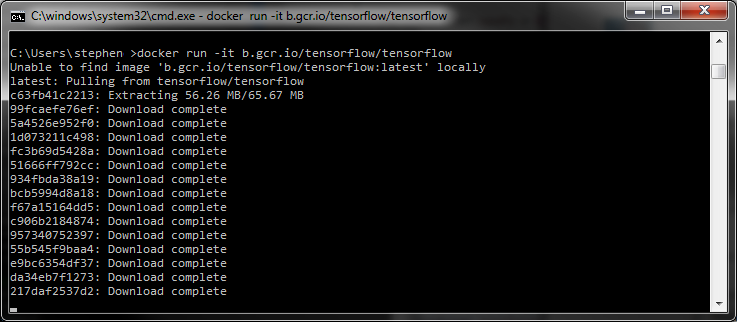
docker run -it -p 8888:8888 gcr.io/tensorflow/tensorflow
And it should start downloading the image which looks like
Because I was behind a corporate web proxy I initially got a
After it's done pulling the files and uncompressing them you should get a linux shell. Go ahead and type
*Technically you're running TensorFlow in a Docker container in a VirtualBox Linux virtual machine running in a Windows PC.
Here's the code from the above image:
Enjoy using TensorFlow on your Windows computer! If you had any Docker errors and/or are behind a web proxy see the notes here.
NOTE:
At the end, the docker tensorflow will run a Notebook that allow us to run ipython on browser.
Run docker-machine ls in the Docker Quick terminal to know the IP of the docker tensorflow
Then, from the host machine, can open Firefox and type that IP:8888
To stop vdocker:
docker-machine stop vdocker
And start it again:
In window cmd:
> docker-machine start vdocker
> FOR /f "tokens=*" %i IN ('docker-machine env --shell cmd vdocker') DO %i
> docker run -it -p 8888:8888 gcr.io/tensorflow/tensorflow
Then we can use [vdocker_IP]:8888 on the host browser :)
How to install and run TensorFlow on a Windows PC
But they did have a Docker image! In case you haven't heard, Docker is a container that wraps up a piece of software in a complete filesystem that contains everything it needs to run: code, runtime, system tools, and system libraries. And Docker is available on Windows.
How I was able to run TensorFlow on my Windows machine
First, I installed the Docker toolbox for Windows.(A quick aside -- As of June 2016 it looks like you can use Docker Toolbox for Windows for Windows Windows 7 or 8 and the newer, currently in beta Docker for Windows for Windows 10. Note the absence of the word 'Toolbox' if you are using Windows 10. Docker is confusing.
Then I opened up the Docker Quickstart Terminal.
It created a default Docker machine for me. You can view the Docker machines available by typing
docker-machine ls$ docker-machine ls
NAME ACTIVE DRIVER STATE URL SWARM
default * virtualbox Running tcp://192.168.99.100:2376
vdocker by typing:$ docker-machine create vdocker -d virtualbox
$ docker-machine ssh vdocker
sudo -s
echo "export HTTP_PROXY=http://proxyhost:8080" >> /var/lib/boot2docker/profile
echo "export HTTPS_PROXY=http://proxyhost:8080" >> /var/lib/boot2docker/profile
exit
exit
$ docker-machine restart vdocker
You exit twice, first to get out of root access, and second to get out of the docker container.
Now if you type
docker-machine ls you should see your two Docker machines NAME ACTIVE DRIVER STATE URL SWARM
default * virtualbox Running tcp://192.168.99.100:2376
vdocker - virtualbox Running tcp://192.168.99.101:2376
Okay, now the Docker machine called 'vdocker' has been created and configured. Now to actually install TensorFlow. Open a Windows cmd prompt (not the Docker terminal) and enter the following:
FOR /f "tokens=*" %i IN ('docker-machine env --shell cmd vdocker') DO %i
You should see some output from the Docker machine like the following screenshot
Then type the following line (from the Docker install page):
docker run -it -p 8888:8888 gcr.io/tensorflow/tensorflow
And it should start downloading the image which looks like
Because I was behind a corporate web proxy I initially got a
docker: An error occurred trying to connect: Post https://192.168.99.101:2376/v1.23/containers/create: Forbidden. which was was resolved by making a proxy exception using these steps.After it's done pulling the files and uncompressing them you should get a linux shell. Go ahead and type
python and try out TensorFlow on your Windows machine*!*Technically you're running TensorFlow in a Docker container in a VirtualBox Linux virtual machine running in a Windows PC.
Here's the code from the above image:
$ python
...
>>> import tensorflow as tf
>>> hello = tf.constant('Hello, TensorFlow!')
>>> sess = tf.Session()
>>> print sess.run(hello)
Hello, TensorFlow!
>>> a = tf.constant(10)
>>> b = tf.constant(32)
>>> print sess.run(a + b)
42
>>>
Enjoy using TensorFlow on your Windows computer! If you had any Docker errors and/or are behind a web proxy see the notes here.
NOTE:
At the end, the docker tensorflow will run a Notebook that allow us to run ipython on browser.
Run docker-machine ls in the Docker Quick terminal to know the IP of the docker tensorflow
Then, from the host machine, can open Firefox and type that IP:8888
To stop vdocker:
docker-machine stop vdocker
And start it again:
In window cmd:
> docker-machine start vdocker
> FOR /f "tokens=*" %i IN ('docker-machine env --shell cmd vdocker') DO %i
> docker run -it -p 8888:8888 gcr.io/tensorflow/tensorflow
Then we can use [vdocker_IP]:8888 on the host browser :)
Tuesday, 6 September 2016
Fix Anaconda Spyder kernel connection problem
Download and install Anaconda for Window:
https://www.continuum.io/downloads
When starting spyder the iPython console is unable to connect to kernel. The console displays:
'import sitecustomize' failed; use -v for traceback
Assertion failed: Socket operation on non-socket (bundled\zeromq\src\select.cpp:185)
https://www.continuum.io/downloads
When starting spyder the iPython console is unable to connect to kernel. The console displays:
'import sitecustomize' failed; use -v for traceback
Assertion failed: Socket operation on non-socket (bundled\zeromq\src\select.cpp:185)
Install Virtuoso & DBPedia (in ubuntu)
Following the turotial:
https://joernhees.de/blog/2015/11/23/setting-up-a-linked-data-mirror-from-rdf-dumps-dbpedia-2015-04-freebase-wikidata-linkedgeodata-with-virtuso-7-2-1-and-docker-optional/
Install Virtuoso 7.2.x manually.
I’ll also mention how you can add the following datasets / vocabularies adding up to nearly 6 G triples:
This guide applies to a clean install. Please check that there’s no older version of Virtuoso installed with
to do the building manually run this to download the file, put it in your home dir on the server, then extract it and switch to the directory:
mkdir ~/virtuoso_deb
cd ~/virtuoso_deb
wget https://github.com/openlink/virtuoso-opensource/releases/download/v7.2.1/virtuoso-opensource-7.2.1.tar.gz
tar -xvzf virtuoso-7.2.1.tar.gz
cd virtuoso-opensource-7.2.1 # or newer, depending what you got
Afterwards you can use the following to install the build dependencies and actually build the .deb packages:
# install build tools
sudo apt-get install -y build-essential devscripts
# to install Virtuoso build dependencies
mk-build-deps -irt'apt-get --no-install-recommends -yV' && dpkg-checkbuilddeps
# to build Virtuoso with 5 processes in parallel
# choose something like your server's #CPUs + 1
dpkg-buildpackage -us -uc -5
Experience:
Run all commands with sudo
During compilation, maybe some error occur:
cp: cannot stat `../../java.sql.Driver4': No such file or directory It compiles on Debian if we remove --with-jdk4 parameters.
Solution:
you need both openjdk 6 for the --with-jdk4 and openjdk 7 for --with-jdk4_1
# sudo apt-get install -y openjdk-6-jdk
# sudo apt-get install -y openjdk-7-jdk
This will take about 15 min.
Afterwards if everything worked out, you should have the *.deb files in ~/virtuoso_deb.
We continue to also build the DBpedia VAD:
./configure --with-layout=debian --enable-dbpedia-vad && \
cd binsrc && make \
cp dbpedia/dbpedia_dav.vad ~/virtuoso_deb/
Finally, let’s create a small local repository out of the .deb files you just built. The advantage of this is that you can simply install virtuoso-server with its dependencies with apt. In theory you could also resolve them manually and install everything with dpkg -i ..., but where’s the fun in that?
cd ~/virtuoso_deb
dpkg-scanpackages ./ | gzip > Packages.gz
Installing Virtuoso
No matter if you used the docker or manual building approach for the .deb packages of Virtuoso, you should now be able to install them with apt-get install ... after telling it where to look for the files for example by doing this:
[sudo echo "deb file:~/virtuoso_deb ./" >> /etc/apt/sources.list.d/virtuoso_local_packages.list]
This command will fail because of permission deny. Use [sudo tee]
echo "deb file:~/virtuoso_deb ./" | sudo tee --append /etc/apt/sources.list.d/virtuoso_local_packages.list
sudo apt-get update
After this just install Virtuoso with the following command (it should warn you about untrusted sources of the Virtuoso packages, which is because we just built them ourselves):
sudo apt-get install virtuoso-server \
virtuoso-vad-bpel \
virtuoso-vad-conductor \
virtuoso-vad-demo \
virtuoso-vad-doc \
virtuoso-vad-isparql \
virtuoso-vad-ods \
virtuoso-vad-rdfmappers \
virtuoso-vad-sparqldemo \
virtuoso-vad-syncml \
virtuoso-vad-tutorial
The above will ask you for a DBA password. Please pick one.
Installing the VAD packages here will actually not install them in the Virtuoso DB file, but just move them in the right place so they can for example be installed as mentioned later.
To also move the DBpedia VAD in place for later you can just run this:
sudo cp ~/virtuoso_deb/dbpedia_dav.vad /usr/share/virtuoso-opensource-7/vad/
Experience:
I have 8G RAM, but I can only set for using 6G RAM for NumberOfBuffers and MaxDirtyBuffers. If we set high RAM, it needs a lot of SWAP data from hard disk to ram, thus it run very slow.
Afterwards restart Virtuoso:
You should now have a running Virtuoso server.
This approach has several implications. For backwards compatibility reasons the standard DBpedia makes statements about URIs such as http://dbpedia.org/resource/Gerhard_Schr%C3%B6der while the local chapters, like the German one, make statements about IRIs such as http://de.dbpedia.org/resource/Gerhard_Schröder (note the ö). In other words and as written above: the standard DBpedia uses URIs to identify things, while the localized versions use IRIs. This also means that http://dbpedia.org/resource/Gerhard_Schröder shouldn’t work. That said, clicking the link will actually work as there is magic going on in your browser to give you what you probably meant. Using curl ?p ?o. } . In order to mitigate this historic problem a bit DBpedia actually offers owl:sameAs links from IRIs to URIs: core/iri-same-as-uri_en.nt.bz2 which you should load, so you at least have a link to what you want if someone tries to get info about an IRI.
As the standard DBpedia provides labels, abstracts and a couple other things in several languages, there are two types of files in the localized DBpedia folders: There are triples directly associating the English URIs with for example the German labels (
# see comment above, you could also get another DBpedia version...
mkdir -p /usr/local/data/datasets/dbpedia/2015-04
cd /usr/local/data/datasets/dbpedia/2015-04
wget -r -nc -nH --cut-dirs=1 -np -l1 -A '*.nt.bz2' -A '*.owl' -R '*unredirected*' http://downloads.dbpedia.org/2015-04/{core/,core-i18n/en,core-i18n/de,dbpedia_2015-04.owl}
Experience:
I don't need German Wiki, so I drop core-i18n/de
As already mentioned, the DBpedia 2015-04 introduced a
# compute md5 hashes for all downloaded files
find . -mindepth 2 -type f -print0 | xargs -0 md5sum > md5sums
# first check if there are duplicates in other folders without core
LC_ALL=C sort md5sums | grep -v '/core/' | uniq -w32 -D
ba3fc042b14cb41e6c4282a6f7c45e02 ./core-i18n/en/instance-types-dbtax-dbo_en.nt.bz2
ba3fc042b14cb41e6c4282a6f7c45e02 ./core-i18n/en/instance_types_dbtax-dbo.nt.bz2
So it seems the ./core-i18n/en/instance-types-dbtax-dbo_en.nt.bz2 and ./core-i18n/en/instance_types_dbtax-dbo.nt.bz2 files are actually the same.
To list all the files in core-i18n/en which are duplicates do this:
# list all dup files in core-i18n/en
LC_ALL=C sort md5sums | uniq -w32 -D | grep '/core-i18n/en'
068975f6dd60f29d13c8442b0dbe403d ./core-i18n/en/skos-categories_en.nt.bz2
14a770f293524a5713f741a1a448bcfa ./core-i18n/en/short-abstracts_en.nt.bz2
1904ad5bc4579fd7efe7f40673c32f79 ./core-i18n/en/specific-mappingbased-properties_en.nt.bz2
1958649209bc90944c65eccd30d37c6c ./core-i18n/en/infobox-property-definitions_en.nt.bz2
2774d36ce14e0143ca4fa25ed212a598 ./core-i18n/en/external-links_en.nt.bz2
314162db2acb516a1ef5fcb3a2c7df2b ./core-i18n/en/geonames_links_en.nt.bz2
3b42f351fc30f6b6b97d3f2a16ef6db3 ./core-i18n/en/instance-types-transitive_en.nt.bz2
3b61b11bdcb50a0d44ca8f4bd68f4762 ./core-i18n/en/revision-ids_en.nt.bz2
43a8b17859c50d37f4cab83573c2992e ./core-i18n/en/instance_types_sdtyped-dbo_en.nt.bz2
4c847b2754294c555236d09485200435 ./core-i18n/en/instance-types_en.nt.bz2
63e2cde88e7bdefb6739c62aa234fc1e ./core-i18n/en/category-labels_en.nt.bz2
64cbbac14769aadf560496b4d948d5e1 ./core-i18n/en/interlanguage-links-chapters_en.nt.bz2
75f2d135459c824feee1d427e4165a4f ./core-i18n/en/transitive-redirects_en.nt.bz2
82fe80c3868a89d54fec26c919a4fa50 ./core-i18n/en/revision-uris_en.nt.bz2
8407c84d262b573418326bdd8f591b95 ./core-i18n/en/mappingbased-properties_en.nt.bz2
87df057913a05dbb5666f360d20fa542 ./core-i18n/en/freebase-links_en.nt.bz2
8cc921fbab5d02ad83b1fda2f87c23f0 ./core-i18n/en/wikipedia-links_en.nt.bz2
9152e34db96df2dd4991e78b7e53ff3f ./core-i18n/en/article-categories_en.nt.bz2
94b48e9df78f746e60a9d0c1aafa3241 ./core-i18n/en/infobox-properties_en.nt.bz2
a254ce4596d045cc047959831edd318a ./core-i18n/en/disambiguations_en.nt.bz2
ab29899e43fab1c6f060cdb8955c5b19 ./core-i18n/en/images_en.nt.bz2
ae046e03be0cf29eac1e3b8a8b3d6b03 ./core-i18n/en/persondata_en.nt.bz2
b4710d36b8dc915f07f5cec2d9971a27 ./core-i18n/en/page-ids_en.nt.bz2
ba3fc042b14cb41e6c4282a6f7c45e02 ./core-i18n/en/instance-types-dbtax-dbo_en.nt.bz2
ba3fc042b14cb41e6c4282a6f7c45e02 ./core-i18n/en/instance_types_dbtax-dbo.nt.bz2
bd90ce4064a120794b5eb5a8d024a97d ./core-i18n/en/long-abstracts_en.nt.bz2
e4c422d1d23c69eff3b9d7d7df3f2f80 ./core-i18n/en/homepages_en.nt.bz2
eafc557cde69fd1cd8f78565c385ee16 ./core-i18n/en/iri-same-as-uri_en.nt.bz2
ef48deae48c9c9c5e17585e3f0243663 ./core-i18n/en/labels_en.nt.bz2
fa8800165c7e80509a4ebddc5f0caf90 ./core-i18n/en/geo-coordinates_en.nt.bz2
# to delete the duplicates from /core-i18n/en, leaving just one of each:
LC_ALL=C sort md5sums | uniq -w32 -D | grep '/core-i18n/en' | uniq -w32 | cut -d' ' -f3 | xargs rm
# afterwards these should be left:
ls -1 core-i18n/en
core-i18n/en/anchor-text_en.nt.bz2
core-i18n/en/article-templates_en.nt.bz2
core-i18n/en/flickr-wrappr-links_en.nt.bz2
core-i18n/en/genders_en.nt.bz2
core-i18n/en/instance_types_dbtax-dbo.nt.bz2
core-i18n/en/instance_types_dbtax_ext.nt.bz2
core-i18n/en/instance_types_lhd_dbo_en.nt.bz2
core-i18n/en/instance_types_lhd_ext_en.nt.bz2
core-i18n/en/interlanguage-links_en.nt.bz2
core-i18n/en/out-degree_en.nt.bz2
core-i18n/en/page-length_en.nt.bz2
core-i18n/en/page-links_en.nt.bz2
core-i18n/en/pnd_en.nt.bz2
core-i18n/en/redirects_en.nt.bz2
core-i18n/en/topical-concepts_en.nt.bz2
As Virtuoso can only import plain (uncompressed) or gzipped files, but the DBpedia dumps are bzipped, you can either repack them into gzip format or extract them. On our server the importing procedure was reasonably slower from extracted files than from gzipped ones (ignoring the vast amount of wasted disk space for the extracted files). File access becomes a bottleneck if you have a couple of cores idling. This is why I decided on repacking all the files from bz2 to gz. As you can see I do the repacking with the parallel versions of bz2 and gz. If that’s not suitable for you, feel free to change it. You might also want to change this if you want to do it in parallel to downloading. The repackaging process below took about 30 minutes but was worth it in the end. The more CPUs you have, the more you can parallelize this process.
# if you want to save space do this:
apt-get install pigz pbzip2
for i in core/*.nt.bz2 core-i18n/*/*.nt.bz2 ; do echo $i ; pbzip2 -dc "$i" | pigz - > "${i%bz2}gz" && rm "$i" ; done
# else do:
#pbzip2 */*.bz2
# notice that the extraction (and repacking) of *.bz2 takes quite a while (about 30 minutes)
# gzipped data is reasonably packed, but still very fast to access (in contrast to bz2), so maybe this is the best choice.
Data Cleaning and The bulk loader scripts
In contrast to the previous versions of this article the Virtuoso import will take care of shortening too long IRIs itself. Also it seems the bulk loader script is included in the more recent Virtuoso versions, so as a reference only: see the old version for the cleaning script and VirtBulkRDFLoaderExampleDbpedia and
http://virtuoso.openlinksw.com/dataspace/dav/wiki/Main/VirtBulkRDFLoaderScript for info about the bulk loader scripts.
Importing DBpedia dumps into Virtuoso
Now AFTER the re-/unpacking of the DBpedia dumps we will register all files in the DBpedia dir (recursively ld_dir_all) to be added to the DBpedia graph. If you use this method make sure that only files reside in the given subtree that you really want to import.
Also don’t forget to import the dbpedia_2015-04.owl file!
If you only want one directory’s files to be added (non recursive) use ld_dir('dir', '*.*', 'graph');.
If you manually want to add some files, use ld_add('file', 'graph');.
See the VirtBulkRDFLoaderScript file for details.
Be warned that it might be a bad idea to import the normal and i18n dataset into the same graph if you didn’t select specific languages, as it might introduce a lot of duplicates that are hard to disentangle.
In order to keep track (and easily reproduce) what was selected and imported into which graph, I actually link (ln -s) the repacked files into a directory structure beneath /usr/local/data/datasets/dbpedia/2015-04/importedGraphs/ and import from there instead. To make sure you think about this, I use that path below, so it won’t work if you didn’t pay attention. If you really want to import all downloaded files, just import /usr/local/data/datasets/dbpedia/2015-04/.
Also be aware of the fact that if you load certain parts of dumps in different graphs (such as I did with the pagelinks, as well as the i18n versions of the DE and FR datasets) that only triples from the http://dbpedia.org graph will be shown when you visit the local pages with your browser (SPARQL is unaffected by this)!
So if you only want to load the same datasets as loaded on the official endpoint then importing the core folder (first section below) and dbpedia_2015-04.owl file should be enough.
The following will prepare the linking for the datasets we loaded:
cd /usr/local/data/datasets/dbpedia/2015-04/
mkdir importedGraphs
cd importedGraphs
mkdir dbpedia.org
cd dbpedia.org
# ln -s ../../dbpedia*.owl ./ # see below!
ln -s ../../core/*.nt.gz ./
cd ..
mkdir ext.dbpedia.org
cd ext.dbpedia.org
ln -s ../../core-i18n/en/anchor-text_en.nt.gz ./
ln -s ../../core-i18n/en/article-templates_en.nt.gz ./
ln -s ../../core-i18n/en/genders_en.nt.gz ./
ln -s ../../core-i18n/en/instance_types_dbtax-dbo.nt.gz ./
ln -s ../../core-i18n/en/instance_types_dbtax_ext.nt.gz ./
ln -s ../../core-i18n/en/instance_types_lhd_dbo_en.nt.gz ./
ln -s ../../core-i18n/en/instance_types_lhd_ext_en.nt.gz ./
ln -s ../../core-i18n/en/out-degree_en.nt.gz ./
ln -s ../../core-i18n/en/page-length_en.nt.gz ./
cd ..
mkdir pagelinks.dbpedia.org
cd pagelinks.dbpedia.org
ln -s ../../core-i18n/en/page-links_en.nt.gz ./
cd ..
mkdir topicalconcepts.dbpedia.org
cd topicalconcepts.dbpedia.org
ln -s ../../core-i18n/en/topical-concepts_en.nt.gz ./
cd ..
If we have downloaded wiki in German and want to import it to virtioso, then:
mkdir de.dbpedia.org
cd de.dbpedia.org
ln -s ../../core-i18n/de/article-categories_de.nt.gz ./
ln -s ../../core-i18n/de/article-templates_de.nt.gz ./
ln -s ../../core-i18n/de/category-labels_de.nt.gz ./
ln -s ../../core-i18n/de/disambiguations_de.nt.gz ./
ln -s ../../core-i18n/de/external-links_de.nt.gz ./
ln -s ../../core-i18n/de/freebase-links_de.nt.gz ./
ln -s ../../core-i18n/de/geo-coordinates_de.nt.gz ./
ln -s ../../core-i18n/de/geonames_links_de.nt.gz ./
ln -s ../../core-i18n/de/homepages_de.nt.gz ./
ln -s ../../core-i18n/de/images_de.nt.gz ./
ln -s ../../core-i18n/de/infobox-properties_de.nt.gz ./
ln -s ../../core-i18n/de/infobox-property-definitions_de.nt.gz ./
ln -s ../../core-i18n/de/instance-types_de.nt.gz ./
ln -s ../../core-i18n/de/instance_types_lhd_dbo_de.nt.gz ./
ln -s ../../core-i18n/de/instance_types_lhd_ext_de.nt.gz ./
ln -s ../../core-i18n/de/instance-types-transitive_de.nt.gz ./
ln -s ../../core-i18n/de/interlanguage-links-chapters_de.nt.gz ./
ln -s ../../core-i18n/de/interlanguage-links_de.nt.gz ./
ln -s ../../core-i18n/de/iri-same-as-uri_de.nt.gz ./
ln -s ../../core-i18n/de/labels_de.nt.gz ./
ln -s ../../core-i18n/de/long-abstracts_de.nt.gz ./
ln -s ../../core-i18n/de/mappingbased-properties_de.nt.gz ./
ln -s ../../core-i18n/de/out-degree_de.nt.gz ./
ln -s ../../core-i18n/de/page-ids_de.nt.gz ./
ln -s ../../core-i18n/de/page-length_de.nt.gz ./
ln -s ../../core-i18n/de/persondata_de.nt.gz ./
ln -s ../../core-i18n/de/pnd_de.nt.gz ./
ln -s ../../core-i18n/de/revision-ids_de.nt.gz ./
ln -s ../../core-i18n/de/revision-uris_de.nt.gz ./
ln -s ../../core-i18n/de/short-abstracts_de.nt.gz ./
ln -s ../../core-i18n/de/skos-categories_de.nt.gz ./
ln -s ../../core-i18n/de/specific-mappingbased-properties_de.nt.gz ./
ln -s ../../core-i18n/de/transitive-redirects_de.nt.gz ./
ln -s ../../core-i18n/de/wikipedia-links_de.nt.gz ./
cd ..
mkdir pagelinks.de.dbpedia.org
cd pagelinks.de.dbpedia.org
ln -s ../../core-i18n/de/page-links_de.nt.gz ./
cd ..
This should have prepared your importedGraphs directory. From this directory you can run the following command which prints out the necessary isql-vt commands to register your graphs for importing:
for g in * ; do echo "ld_dir_all('$(pwd)/$g', '*.*', 'http://$g');" ; done
One more thing (thanks to Romain): In order for the DBpedia.vad package (which is installed at the end) to work correctly, the dbpedia_2014.owl file needs to be imported into graph http://dbpedia.org/resource/classes#.
Note: In the following i will assume that your Virtuoso isql command is called isql-vt. If you’re in lack of such a command, it might be called isql or isql-v, but this usually means you installed it using some other method than described in here
run with sudo:
isql-vt # enter Virtuoso isql mode
-- we are in sql mode now
ld_add('/usr/local/data/datasets/dbpedia/2015-04/dbpedia_2015-04.owl', 'http://dbpedia.org/resource/classes#');
ld_dir_all('/usr/local/data/datasets/dbpedia/2015-04/importedGraphs/dbpedia.org', '*.*', 'http://dbpedia.org');
ld_dir_all('/usr/local/data/datasets/dbpedia/2015-04/importedGraphs/de.dbpedia.org', '*.*', 'http://de.dbpedia.org');
ld_dir_all('/usr/local/data/datasets/dbpedia/2015-04/importedGraphs/ext.dbpedia.org', '*.*', 'http://ext.dbpedia.org');
ld_dir_all('/usr/local/data/datasets/dbpedia/2015-04/importedGraphs/pagelinks.dbpedia.org', '*.*', 'http://pagelinks.dbpedia.org');
ld_dir_all('/usr/local/data/datasets/dbpedia/2015-04/importedGraphs/pagelinks.de.dbpedia.org', '*.*', 'http://pagelinks.de.dbpedia.org');
ld_dir_all('/usr/local/data/datasets/dbpedia/2015-04/importedGraphs/topicalconcepts.dbpedia.org', '*.*', 'http://topicalconcepts.dbpedia.org');
-- do the following to see which files were registered to be added:
SELECT * FROM DB.DBA.LOAD_LIST;
-- if unsatisfied use:
-- delete from DB.DBA.LOAD_LIST;
EXIT;
Our full DB.DBA.LOAD_LIST currently looks like this:
SELECT ll_graph, ll_file FROM DB.DBA.LOAD_LIST;
ll_graph ll_file
VARCHAR VARCHAR NOT NULL
____________________________________
http://dblp.l3s.de /usr/local/data/datasets/dblp/l3s/2015-11-04/dblp.nt.gz
http://dbpedia.org/resource/classes# /usr/local/data/datasets/remote/dbpedia/2015-04/dbpedia_2015-04.owl
http://dbpedia.org /usr/local/data/datasets/dbpedia/2015-04/importedGraphs/dbpedia.org/amsterdammuseum_links.nt.gz
...
XXX Rows. -- XX msec.
OK, now comes the fun (and long part: about 1.5 hours (new Virtuoso 7 is cool 😉 for DBpedia alone, +~6 hours for Freebase)… After we registered the files to be added, now let’s finally start the process. Fire up screen if you didn’t already. (For more detailed metering than below see VirtTipsAndTricksGuideLDMeterUtility.)
sudo apt-get install screen
sudo screen isql-vt
rdf_loader_run();
-- DO NOT USE THE DB BESIDES THE FOLLOWING COMMANDS:
-- depending on the amount of CPUs and your IO performance you can run
-- more rdf_loader_run(); commands in other isql-vt sessions which will
-- speed up the import process.
-- you can watch the progress from another isql-vt session with:
-- select * from DB.DBA.LOAD_LIST;
-- if you need to stop the loading for any reason: rdf_load_stop();
-- if you want to force stopping: rdf_load_stop(1);
checkpoint;
commit WORK;
checkpoint;
EXIT;
Experience:
I have CPU i5 - 4 cores, 8G Ram. If I run 4 parallel isql-vt sessions for importing, it will make a lot of threads of reading/writing to disk. Instead, I just run 2 parallel sessions in two different terminal windows. It run faster.
I have imported DBPedia only. It took me 2 days for importing data to virtuoso. After finishing, the size of virtuoso database is around 56G
After this:
Take a look into var/lib/virtuoso/db/virtuoso.log and run this:
isql-vt BANNER=OFF VERBOSE=OFF 'EXEC=SELECT * FROM DB.DBA.LOAD_LIST WHERE ll_error IS NOT NULL;'
Should you find any errors in there… FIX THEM! You might be able to use the dump, but it’s incomplete in those cases. Any error quits out of the loading of the corresponding file and continues with the next one, so you’re only using the part of that file up to the place where the error occurred. (Should you find errors you can’t fix, please leave a comment.)
http://your-server:8890
login: dba
pw: our_setting_password
Go to System Admin / Packages. Install the DBpedia (v. 1.4.30) and rdf_mappers (v. 1.34.74) packages (takes about 5 minutes).
This shouldn’t take long in Virtuoso 7 anymore and for me now returns 849,521,186 for DBpedia (en+de) or 5,959,006,725 with all the datasets mentioned above.
I also like this query showing all the graphs and how many triples are in them:
Congratulations, you just imported nearly 850 million triples (or nearly 6 G triples for all datasets).
sudo -i
cd /
/etc/init.d/virtuoso-opensource stop &&
tar -cvf - /var/lib/virtuoso | lzop > virtuoso-7.1.0-DBDUMP-$(date '+%F')-dbpedia-2015-04-en_de.tar.lzop &&
/etc/init.d/virtuoso-opensource start
Yay, done.
https://joernhees.de/blog/2015/11/23/setting-up-a-linked-data-mirror-from-rdf-dumps-dbpedia-2015-04-freebase-wikidata-linkedgeodata-with-virtuso-7-2-1-and-docker-optional/
Install Virtuoso 7.2.x manually.
I’ll also mention how you can add the following datasets / vocabularies adding up to nearly 6 G triples:
- Freebase (~ 3 G triples)
- LinkedGeoData (~ 1 G triples)
- Wikidata (~ 841 M triples)
- DBLP (~ 82 M triples)
- Yago Labels (~ 45 M triples)
- Umbel (~ 480 K triples)
- Schema.org (~ 9 K triples)
Used Versions
- DBpedia 2015-04
- Virtuoso OpenSource 7.2.1
- Ubuntu 14.04 LTS or Debian 8
Prerequisites
A strong machine with root access and enough RAM: We used a VM with 4 Cores and 32 GBs of RAM for DBpedia only. If you intend to also load Freebase and other datasets i recommend at least 64 GBs of RAM (we actually ended up using a 16 Core, 256 GB RAM Server in our research group). For installing i recommend more than 128 GB free HD space for DBpedia alone, 512 GB if you want to load Freebase as well, especially for downloading and repacking the datasets, as well as the growing database file when importing (mine grew to 64 GBs for DBpedia and 320 GB with all the datasets mentioned above).This guide applies to a clean install. Please check that there’s no older version of Virtuoso installed with
dpkg -l | grep virtuoso ; which isql ; which isql-vt
(no output is good). If there is, please know what you’re doing.
Virtuoso 6 and 7 use different default locations for their DBs, but in
general newer versions should be able to upgrade older DB files if
correctly configured to use the same DB file. In general i’d suggest to
either uninstall the older version and its config files and then install
the new one according to this guide mentioned below.to do the building manually run this to download the file, put it in your home dir on the server, then extract it and switch to the directory:
mkdir ~/virtuoso_deb
cd ~/virtuoso_deb
wget https://github.com/openlink/virtuoso-opensource/releases/download/v7.2.1/virtuoso-opensource-7.2.1.tar.gz
tar -xvzf virtuoso-7.2.1.tar.gz
cd virtuoso-opensource-7.2.1 # or newer, depending what you got
Afterwards you can use the following to install the build dependencies and actually build the .deb packages:
# install build tools
sudo apt-get install -y build-essential devscripts
# to install Virtuoso build dependencies
mk-build-deps -irt'apt-get --no-install-recommends -yV' && dpkg-checkbuilddeps
# to build Virtuoso with 5 processes in parallel
# choose something like your server's #CPUs + 1
dpkg-buildpackage -us -uc -5
Experience:
Run all commands with sudo
During compilation, maybe some error occur:
cp: cannot stat `../../java.sql.Driver4': No such file or directory It compiles on Debian if we remove --with-jdk4 parameters.
Solution:
you need both openjdk 6 for the --with-jdk4 and openjdk 7 for --with-jdk4_1
# sudo apt-get install -y openjdk-6-jdk
# sudo apt-get install -y openjdk-7-jdk
This will take about 15 min.
Afterwards if everything worked out, you should have the *.deb files in ~/virtuoso_deb.
We continue to also build the DBpedia VAD:
./configure --with-layout=debian --enable-dbpedia-vad && \
cd binsrc && make \
cp dbpedia/dbpedia_dav.vad ~/virtuoso_deb/
Finally, let’s create a small local repository out of the .deb files you just built. The advantage of this is that you can simply install virtuoso-server with its dependencies with apt. In theory you could also resolve them manually and install everything with dpkg -i ..., but where’s the fun in that?
cd ~/virtuoso_deb
dpkg-scanpackages ./ | gzip > Packages.gz
Installing Virtuoso
No matter if you used the docker or manual building approach for the .deb packages of Virtuoso, you should now be able to install them with apt-get install ... after telling it where to look for the files for example by doing this:
[sudo echo "deb file:~/virtuoso_deb ./" >> /etc/apt/sources.list.d/virtuoso_local_packages.list]
This command will fail because of permission deny. Use [sudo tee]
echo "deb file:~/virtuoso_deb ./" | sudo tee --append /etc/apt/sources.list.d/virtuoso_local_packages.list
sudo apt-get update
After this just install Virtuoso with the following command (it should warn you about untrusted sources of the Virtuoso packages, which is because we just built them ourselves):
sudo apt-get install virtuoso-server \
virtuoso-vad-bpel \
virtuoso-vad-conductor \
virtuoso-vad-demo \
virtuoso-vad-doc \
virtuoso-vad-isparql \
virtuoso-vad-ods \
virtuoso-vad-rdfmappers \
virtuoso-vad-sparqldemo \
virtuoso-vad-syncml \
virtuoso-vad-tutorial
The above will ask you for a DBA password. Please pick one.
Installing the VAD packages here will actually not install them in the Virtuoso DB file, but just move them in the right place so they can for example be installed as mentioned later.
To also move the DBpedia VAD in place for later you can just run this:
sudo cp ~/virtuoso_deb/dbpedia_dav.vad /usr/share/virtuoso-opensource-7/vad/
Configuring Virtuoso
Now change the following values in/etc/virtuoso-opensource-7/virtuoso.ini, the performance tuning stuff is according to http://virtuoso.openlinksw.com/dataspace/dav/wiki/Main/VirtRDFPerformanceTuning:
# note: Virtuoso ignores lines starting with whitespace and stuff after a ;
[Parameters]
# you need to include the directory where your datasets will be downloaded
# to, in our case /usr/local/data/datasets:
DirsAllowed = ., /usr/share/virtuoso/vad, /usr/local/data/datasets
# IMPORTANT: for performance also do this
[Parameters]
# the following two are as suggested by comments in the original .ini
# file in order to use the RAM on your server:
NumberOfBuffers = 2720000
MaxDirtyBuffers = 2000000
# each buffer caches a 8K page of data and occupies approx. 8700 bytes of
# memory. It's suggested to set this value to 65 % of ram for a db only server
# so if you have 32 GB of ram: 32*1000^3*0.65/8700 = 2390804
# default is 2000 which will use 16 MB ram ;)
# Make sure to remove whitespace if you uncomment existing lines!
[Database]
MaxCheckpointRemap = 625000
# set this to 1/4th of NumberOfBuffers
[SPARQL]
# I like to increase the ResultSetMaxrows, MaxQueryCostEstimationTime
# and MaxQueryExecutionTime drastically as it's a local store where we
# do quite complex queries... up to you (don't do this if a lot of people
# use it).
# In any case for the importer to be more robust add the following setting
# to this section:
ShortenLongURIs = 1
[Parameters]
# you need to include the directory where your datasets will be downloaded
# to, in our case /usr/local/data/datasets:
DirsAllowed = ., /usr/share/virtuoso/vad, /usr/local/data/datasets
# IMPORTANT: for performance also do this
[Parameters]
# the following two are as suggested by comments in the original .ini
# file in order to use the RAM on your server:
NumberOfBuffers = 2720000
MaxDirtyBuffers = 2000000
# each buffer caches a 8K page of data and occupies approx. 8700 bytes of
# memory. It's suggested to set this value to 65 % of ram for a db only server
# so if you have 32 GB of ram: 32*1000^3*0.65/8700 = 2390804
# default is 2000 which will use 16 MB ram ;)
# Make sure to remove whitespace if you uncomment existing lines!
[Database]
MaxCheckpointRemap = 625000
# set this to 1/4th of NumberOfBuffers
[SPARQL]
# I like to increase the ResultSetMaxrows, MaxQueryCostEstimationTime
# and MaxQueryExecutionTime drastically as it's a local store where we
# do quite complex queries... up to you (don't do this if a lot of people
# use it).
# In any case for the importer to be more robust add the following setting
# to this section:
ShortenLongURIs = 1
Experience:
I have 8G RAM, but I can only set for using 6G RAM for NumberOfBuffers and MaxDirtyBuffers. If we set high RAM, it needs a lot of SWAP data from hard disk to ram, thus it run very slow.
Afterwards restart Virtuoso:
# sudo /etc/init.d/virtuoso-opensource-7 stop
# sudo /etc/init.d/virtuoso-opensource-7 start
You should now have a running Virtuoso server.
DBpedia URIs (en) vs. DBpedia IRIs (i18n)
The DBpedia 2015-04 consists of several datasets: one “standard” English version and several localized versions for other languages (i18n). The standard version mints URIs by going through all English Wikipedia articles. For all of these the Wikipedia cross-language links are used to extract corresponding labels in other languages for the en URIs (e.g.,core/labels-en-uris_de.nt.bz2).
This is problematic as for example articles which are only in the
German Wikipedia won’t be extracted. To solve this problem the i18n
versions exists and create IRIs in the form of de.dbpedia.org for every
article in the German Wikipedia (e.g., core-i18n/de/labels_de.nt.bz2).This approach has several implications. For backwards compatibility reasons the standard DBpedia makes statements about URIs such as http://dbpedia.org/resource/Gerhard_Schr%C3%B6der while the local chapters, like the German one, make statements about IRIs such as http://de.dbpedia.org/resource/Gerhard_Schröder (note the ö). In other words and as written above: the standard DBpedia uses URIs to identify things, while the localized versions use IRIs. This also means that http://dbpedia.org/resource/Gerhard_Schröder shouldn’t work. That said, clicking the link will actually work as there is magic going on in your browser to give you what you probably meant. Using curl
curl -i -L -H "Accept: application/rdf+xml" http://dbpedia.org/resource/Gerhard_Schröder
or SPARQLing the endpoint will nevertheless not be so nice/sloppy and
can cause quite some headache. Observe how the following two SPARQL
queries return different results: select * where { dbpedia:Gerhard_Schröder ?p ?o. } vs. select * where { As the standard DBpedia provides labels, abstracts and a couple other things in several languages, there are two types of files in the localized DBpedia folders: There are triples directly associating the English URIs with for example the German labels (
{core,core-i18n/de}/labels-en-uris_de.nt.bz2) and there are the localized triple files which associate for example the DE IRIs with the German labels (core-i18n/de/labels_de.nt.bz2).Downloading the DBpedia dump files, de-duplication & Repacking
For our group we decided that we wanted a reasonably complete mirror of the standard DBpedia (EN) (have a look at the core directory, which contains all datasets loaded into the public DBpedia SPARQL Endpoint), but also the i18n versions for the German DBpedia loaded in separate graphs, as well as each of their pagelink datasets in yet another separate graph each. For this we download the corresponding files in (NT) format as follows. If you need something different do so (and maybe report back if there were problems and how you solved them).# see comment above, you could also get another DBpedia version...
mkdir -p /usr/local/data/datasets/dbpedia/2015-04
cd /usr/local/data/datasets/dbpedia/2015-04
wget -r -nc -nH --cut-dirs=1 -np -l1 -A '*.nt.bz2' -A '*.owl' -R '*unredirected*' http://downloads.dbpedia.org/2015-04/{core/,core-i18n/en,core-i18n/de,dbpedia_2015-04.owl}
Experience:
I don't need German Wiki, so I drop core-i18n/de
As already mentioned, the DBpedia 2015-04 introduced a
core
folder which contains all files loaded on the public DBpedia endpoint.
Be aware that if you download other folders like above you’ll be
downloading some files twice in other folders (e.g., labels-en-uris_de.nt.bz2 can be found in both, the core folder and the core-i18n/de folder). Quite obvious, but especially the core-i18n/en folder contains very many duplicate files from core. If want to see which downloaded files are duplicates (independent of their name) and especially which core-i18n/en files were not loaded on the public endpoint, so are not in core, you can do the following:# compute md5 hashes for all downloaded files
find . -mindepth 2 -type f -print0 | xargs -0 md5sum > md5sums
# first check if there are duplicates in other folders without core
LC_ALL=C sort md5sums | grep -v '/core/' | uniq -w32 -D
ba3fc042b14cb41e6c4282a6f7c45e02 ./core-i18n/en/instance-types-dbtax-dbo_en.nt.bz2
ba3fc042b14cb41e6c4282a6f7c45e02 ./core-i18n/en/instance_types_dbtax-dbo.nt.bz2
So it seems the ./core-i18n/en/instance-types-dbtax-dbo_en.nt.bz2 and ./core-i18n/en/instance_types_dbtax-dbo.nt.bz2 files are actually the same.
To list all the files in core-i18n/en which are duplicates do this:
# list all dup files in core-i18n/en
LC_ALL=C sort md5sums | uniq -w32 -D | grep '/core-i18n/en'
068975f6dd60f29d13c8442b0dbe403d ./core-i18n/en/skos-categories_en.nt.bz2
14a770f293524a5713f741a1a448bcfa ./core-i18n/en/short-abstracts_en.nt.bz2
1904ad5bc4579fd7efe7f40673c32f79 ./core-i18n/en/specific-mappingbased-properties_en.nt.bz2
1958649209bc90944c65eccd30d37c6c ./core-i18n/en/infobox-property-definitions_en.nt.bz2
2774d36ce14e0143ca4fa25ed212a598 ./core-i18n/en/external-links_en.nt.bz2
314162db2acb516a1ef5fcb3a2c7df2b ./core-i18n/en/geonames_links_en.nt.bz2
3b42f351fc30f6b6b97d3f2a16ef6db3 ./core-i18n/en/instance-types-transitive_en.nt.bz2
3b61b11bdcb50a0d44ca8f4bd68f4762 ./core-i18n/en/revision-ids_en.nt.bz2
43a8b17859c50d37f4cab83573c2992e ./core-i18n/en/instance_types_sdtyped-dbo_en.nt.bz2
4c847b2754294c555236d09485200435 ./core-i18n/en/instance-types_en.nt.bz2
63e2cde88e7bdefb6739c62aa234fc1e ./core-i18n/en/category-labels_en.nt.bz2
64cbbac14769aadf560496b4d948d5e1 ./core-i18n/en/interlanguage-links-chapters_en.nt.bz2
75f2d135459c824feee1d427e4165a4f ./core-i18n/en/transitive-redirects_en.nt.bz2
82fe80c3868a89d54fec26c919a4fa50 ./core-i18n/en/revision-uris_en.nt.bz2
8407c84d262b573418326bdd8f591b95 ./core-i18n/en/mappingbased-properties_en.nt.bz2
87df057913a05dbb5666f360d20fa542 ./core-i18n/en/freebase-links_en.nt.bz2
8cc921fbab5d02ad83b1fda2f87c23f0 ./core-i18n/en/wikipedia-links_en.nt.bz2
9152e34db96df2dd4991e78b7e53ff3f ./core-i18n/en/article-categories_en.nt.bz2
94b48e9df78f746e60a9d0c1aafa3241 ./core-i18n/en/infobox-properties_en.nt.bz2
a254ce4596d045cc047959831edd318a ./core-i18n/en/disambiguations_en.nt.bz2
ab29899e43fab1c6f060cdb8955c5b19 ./core-i18n/en/images_en.nt.bz2
ae046e03be0cf29eac1e3b8a8b3d6b03 ./core-i18n/en/persondata_en.nt.bz2
b4710d36b8dc915f07f5cec2d9971a27 ./core-i18n/en/page-ids_en.nt.bz2
ba3fc042b14cb41e6c4282a6f7c45e02 ./core-i18n/en/instance-types-dbtax-dbo_en.nt.bz2
ba3fc042b14cb41e6c4282a6f7c45e02 ./core-i18n/en/instance_types_dbtax-dbo.nt.bz2
bd90ce4064a120794b5eb5a8d024a97d ./core-i18n/en/long-abstracts_en.nt.bz2
e4c422d1d23c69eff3b9d7d7df3f2f80 ./core-i18n/en/homepages_en.nt.bz2
eafc557cde69fd1cd8f78565c385ee16 ./core-i18n/en/iri-same-as-uri_en.nt.bz2
ef48deae48c9c9c5e17585e3f0243663 ./core-i18n/en/labels_en.nt.bz2
fa8800165c7e80509a4ebddc5f0caf90 ./core-i18n/en/geo-coordinates_en.nt.bz2
# to delete the duplicates from /core-i18n/en, leaving just one of each:
LC_ALL=C sort md5sums | uniq -w32 -D | grep '/core-i18n/en' | uniq -w32 | cut -d' ' -f3 | xargs rm
# afterwards these should be left:
ls -1 core-i18n/en
core-i18n/en/anchor-text_en.nt.bz2
core-i18n/en/article-templates_en.nt.bz2
core-i18n/en/flickr-wrappr-links_en.nt.bz2
core-i18n/en/genders_en.nt.bz2
core-i18n/en/instance_types_dbtax-dbo.nt.bz2
core-i18n/en/instance_types_dbtax_ext.nt.bz2
core-i18n/en/instance_types_lhd_dbo_en.nt.bz2
core-i18n/en/instance_types_lhd_ext_en.nt.bz2
core-i18n/en/interlanguage-links_en.nt.bz2
core-i18n/en/out-degree_en.nt.bz2
core-i18n/en/page-length_en.nt.bz2
core-i18n/en/page-links_en.nt.bz2
core-i18n/en/pnd_en.nt.bz2
core-i18n/en/redirects_en.nt.bz2
core-i18n/en/topical-concepts_en.nt.bz2
As Virtuoso can only import plain (uncompressed) or gzipped files, but the DBpedia dumps are bzipped, you can either repack them into gzip format or extract them. On our server the importing procedure was reasonably slower from extracted files than from gzipped ones (ignoring the vast amount of wasted disk space for the extracted files). File access becomes a bottleneck if you have a couple of cores idling. This is why I decided on repacking all the files from bz2 to gz. As you can see I do the repacking with the parallel versions of bz2 and gz. If that’s not suitable for you, feel free to change it. You might also want to change this if you want to do it in parallel to downloading. The repackaging process below took about 30 minutes but was worth it in the end. The more CPUs you have, the more you can parallelize this process.
# if you want to save space do this:
apt-get install pigz pbzip2
for i in core/*.nt.bz2 core-i18n/*/*.nt.bz2 ; do echo $i ; pbzip2 -dc "$i" | pigz - > "${i%bz2}gz" && rm "$i" ; done
# else do:
#pbzip2 */*.bz2
# notice that the extraction (and repacking) of *.bz2 takes quite a while (about 30 minutes)
# gzipped data is reasonably packed, but still very fast to access (in contrast to bz2), so maybe this is the best choice.
Data Cleaning and The bulk loader scripts
In contrast to the previous versions of this article the Virtuoso import will take care of shortening too long IRIs itself. Also it seems the bulk loader script is included in the more recent Virtuoso versions, so as a reference only: see the old version for the cleaning script and VirtBulkRDFLoaderExampleDbpedia and
http://virtuoso.openlinksw.com/dataspace/dav/wiki/Main/VirtBulkRDFLoaderScript for info about the bulk loader scripts.
Importing DBpedia dumps into Virtuoso
Now AFTER the re-/unpacking of the DBpedia dumps we will register all files in the DBpedia dir (recursively ld_dir_all) to be added to the DBpedia graph. If you use this method make sure that only files reside in the given subtree that you really want to import.
Also don’t forget to import the dbpedia_2015-04.owl file!
If you only want one directory’s files to be added (non recursive) use ld_dir('dir', '*.*', 'graph');.
If you manually want to add some files, use ld_add('file', 'graph');.
See the VirtBulkRDFLoaderScript file for details.
Be warned that it might be a bad idea to import the normal and i18n dataset into the same graph if you didn’t select specific languages, as it might introduce a lot of duplicates that are hard to disentangle.
In order to keep track (and easily reproduce) what was selected and imported into which graph, I actually link (ln -s) the repacked files into a directory structure beneath /usr/local/data/datasets/dbpedia/2015-04/importedGraphs/ and import from there instead. To make sure you think about this, I use that path below, so it won’t work if you didn’t pay attention. If you really want to import all downloaded files, just import /usr/local/data/datasets/dbpedia/2015-04/.
Also be aware of the fact that if you load certain parts of dumps in different graphs (such as I did with the pagelinks, as well as the i18n versions of the DE and FR datasets) that only triples from the http://dbpedia.org graph will be shown when you visit the local pages with your browser (SPARQL is unaffected by this)!
So if you only want to load the same datasets as loaded on the official endpoint then importing the core folder (first section below) and dbpedia_2015-04.owl file should be enough.
The following will prepare the linking for the datasets we loaded:
cd /usr/local/data/datasets/dbpedia/2015-04/
mkdir importedGraphs
cd importedGraphs
mkdir dbpedia.org
cd dbpedia.org
# ln -s ../../dbpedia*.owl ./ # see below!
ln -s ../../core/*.nt.gz ./
cd ..
mkdir ext.dbpedia.org
cd ext.dbpedia.org
ln -s ../../core-i18n/en/anchor-text_en.nt.gz ./
ln -s ../../core-i18n/en/article-templates_en.nt.gz ./
ln -s ../../core-i18n/en/genders_en.nt.gz ./
ln -s ../../core-i18n/en/instance_types_dbtax-dbo.nt.gz ./
ln -s ../../core-i18n/en/instance_types_dbtax_ext.nt.gz ./
ln -s ../../core-i18n/en/instance_types_lhd_dbo_en.nt.gz ./
ln -s ../../core-i18n/en/instance_types_lhd_ext_en.nt.gz ./
ln -s ../../core-i18n/en/out-degree_en.nt.gz ./
ln -s ../../core-i18n/en/page-length_en.nt.gz ./
cd ..
mkdir pagelinks.dbpedia.org
cd pagelinks.dbpedia.org
ln -s ../../core-i18n/en/page-links_en.nt.gz ./
cd ..
mkdir topicalconcepts.dbpedia.org
cd topicalconcepts.dbpedia.org
ln -s ../../core-i18n/en/topical-concepts_en.nt.gz ./
cd ..
If we have downloaded wiki in German and want to import it to virtioso, then:
mkdir de.dbpedia.org
cd de.dbpedia.org
ln -s ../../core-i18n/de/article-categories_de.nt.gz ./
ln -s ../../core-i18n/de/article-templates_de.nt.gz ./
ln -s ../../core-i18n/de/category-labels_de.nt.gz ./
ln -s ../../core-i18n/de/disambiguations_de.nt.gz ./
ln -s ../../core-i18n/de/external-links_de.nt.gz ./
ln -s ../../core-i18n/de/freebase-links_de.nt.gz ./
ln -s ../../core-i18n/de/geo-coordinates_de.nt.gz ./
ln -s ../../core-i18n/de/geonames_links_de.nt.gz ./
ln -s ../../core-i18n/de/homepages_de.nt.gz ./
ln -s ../../core-i18n/de/images_de.nt.gz ./
ln -s ../../core-i18n/de/infobox-properties_de.nt.gz ./
ln -s ../../core-i18n/de/infobox-property-definitions_de.nt.gz ./
ln -s ../../core-i18n/de/instance-types_de.nt.gz ./
ln -s ../../core-i18n/de/instance_types_lhd_dbo_de.nt.gz ./
ln -s ../../core-i18n/de/instance_types_lhd_ext_de.nt.gz ./
ln -s ../../core-i18n/de/instance-types-transitive_de.nt.gz ./
ln -s ../../core-i18n/de/interlanguage-links-chapters_de.nt.gz ./
ln -s ../../core-i18n/de/interlanguage-links_de.nt.gz ./
ln -s ../../core-i18n/de/iri-same-as-uri_de.nt.gz ./
ln -s ../../core-i18n/de/labels_de.nt.gz ./
ln -s ../../core-i18n/de/long-abstracts_de.nt.gz ./
ln -s ../../core-i18n/de/mappingbased-properties_de.nt.gz ./
ln -s ../../core-i18n/de/out-degree_de.nt.gz ./
ln -s ../../core-i18n/de/page-ids_de.nt.gz ./
ln -s ../../core-i18n/de/page-length_de.nt.gz ./
ln -s ../../core-i18n/de/persondata_de.nt.gz ./
ln -s ../../core-i18n/de/pnd_de.nt.gz ./
ln -s ../../core-i18n/de/revision-ids_de.nt.gz ./
ln -s ../../core-i18n/de/revision-uris_de.nt.gz ./
ln -s ../../core-i18n/de/short-abstracts_de.nt.gz ./
ln -s ../../core-i18n/de/skos-categories_de.nt.gz ./
ln -s ../../core-i18n/de/specific-mappingbased-properties_de.nt.gz ./
ln -s ../../core-i18n/de/transitive-redirects_de.nt.gz ./
ln -s ../../core-i18n/de/wikipedia-links_de.nt.gz ./
cd ..
mkdir pagelinks.de.dbpedia.org
cd pagelinks.de.dbpedia.org
ln -s ../../core-i18n/de/page-links_de.nt.gz ./
cd ..
This should have prepared your importedGraphs directory. From this directory you can run the following command which prints out the necessary isql-vt commands to register your graphs for importing:
for g in * ; do echo "ld_dir_all('$(pwd)/$g', '*.*', 'http://$g');" ; done
One more thing (thanks to Romain): In order for the DBpedia.vad package (which is installed at the end) to work correctly, the dbpedia_2014.owl file needs to be imported into graph http://dbpedia.org/resource/classes#.
Note: In the following i will assume that your Virtuoso isql command is called isql-vt. If you’re in lack of such a command, it might be called isql or isql-v, but this usually means you installed it using some other method than described in here
run with sudo:
isql-vt # enter Virtuoso isql mode
-- we are in sql mode now
ld_add('/usr/local/data/datasets/dbpedia/2015-04/dbpedia_2015-04.owl', 'http://dbpedia.org/resource/classes#');
ld_dir_all('/usr/local/data/datasets/dbpedia/2015-04/importedGraphs/dbpedia.org', '*.*', 'http://dbpedia.org');
ld_dir_all('/usr/local/data/datasets/dbpedia/2015-04/importedGraphs/de.dbpedia.org', '*.*', 'http://de.dbpedia.org');
ld_dir_all('/usr/local/data/datasets/dbpedia/2015-04/importedGraphs/ext.dbpedia.org', '*.*', 'http://ext.dbpedia.org');
ld_dir_all('/usr/local/data/datasets/dbpedia/2015-04/importedGraphs/pagelinks.dbpedia.org', '*.*', 'http://pagelinks.dbpedia.org');
ld_dir_all('/usr/local/data/datasets/dbpedia/2015-04/importedGraphs/pagelinks.de.dbpedia.org', '*.*', 'http://pagelinks.de.dbpedia.org');
ld_dir_all('/usr/local/data/datasets/dbpedia/2015-04/importedGraphs/topicalconcepts.dbpedia.org', '*.*', 'http://topicalconcepts.dbpedia.org');
-- do the following to see which files were registered to be added:
SELECT * FROM DB.DBA.LOAD_LIST;
-- if unsatisfied use:
-- delete from DB.DBA.LOAD_LIST;
EXIT;
Our full DB.DBA.LOAD_LIST currently looks like this:
SELECT ll_graph, ll_file FROM DB.DBA.LOAD_LIST;
ll_graph ll_file
VARCHAR VARCHAR NOT NULL
____________________________________
http://dblp.l3s.de /usr/local/data/datasets/dblp/l3s/2015-11-04/dblp.nt.gz
http://dbpedia.org/resource/classes# /usr/local/data/datasets/remote/dbpedia/2015-04/dbpedia_2015-04.owl
http://dbpedia.org /usr/local/data/datasets/dbpedia/2015-04/importedGraphs/dbpedia.org/amsterdammuseum_links.nt.gz
...
XXX Rows. -- XX msec.
OK, now comes the fun (and long part: about 1.5 hours (new Virtuoso 7 is cool 😉 for DBpedia alone, +~6 hours for Freebase)… After we registered the files to be added, now let’s finally start the process. Fire up screen if you didn’t already. (For more detailed metering than below see VirtTipsAndTricksGuideLDMeterUtility.)
sudo apt-get install screen
sudo screen isql-vt
rdf_loader_run();
-- DO NOT USE THE DB BESIDES THE FOLLOWING COMMANDS:
-- depending on the amount of CPUs and your IO performance you can run
-- more rdf_loader_run(); commands in other isql-vt sessions which will
-- speed up the import process.
-- you can watch the progress from another isql-vt session with:
-- select * from DB.DBA.LOAD_LIST;
-- if you need to stop the loading for any reason: rdf_load_stop();
-- if you want to force stopping: rdf_load_stop(1);
checkpoint;
commit WORK;
checkpoint;
EXIT;
Experience:
I have CPU i5 - 4 cores, 8G Ram. If I run 4 parallel isql-vt sessions for importing, it will make a lot of threads of reading/writing to disk. Instead, I just run 2 parallel sessions in two different terminal windows. It run faster.
I have imported DBPedia only. It took me 2 days for importing data to virtuoso. After finishing, the size of virtuoso database is around 56G
After this:
Take a look into var/lib/virtuoso/db/virtuoso.log and run this:
isql-vt BANNER=OFF VERBOSE=OFF 'EXEC=SELECT * FROM DB.DBA.LOAD_LIST WHERE ll_error IS NOT NULL;'
Should you find any errors in there… FIX THEM! You might be able to use the dump, but it’s incomplete in those cases. Any error quits out of the loading of the corresponding file and continues with the next one, so you’re only using the part of that file up to the place where the error occurred. (Should you find errors you can’t fix, please leave a comment.)
Final polishing
You can & should now install the DBpedia and RDF Mappers packages from the Virtuoso Conductor.http://your-server:8890
login: dba
pw: our_setting_password
Go to System Admin / Packages. Install the DBpedia (v. 1.4.30) and rdf_mappers (v. 1.34.74) packages (takes about 5 minutes).
Testing your local mirror
Go to the sparql-endpoint of your serverhttp://your-server:8890/sparql (or in isql-vt prefix with: SPARQL)
sparql SELECT COUNT(*) WHERE { ?s ?p ?o } ;
This shouldn’t take long in Virtuoso 7 anymore and for me now returns 849,521,186 for DBpedia (en+de) or 5,959,006,725 with all the datasets mentioned above.
I also like this query showing all the graphs and how many triples are in them:
Congratulations, you just imported nearly 850 million triples (or nearly 6 G triples for all datasets).
Backing up this initial state
Now is a good moment to backup the whole db (takes about half an hour):sudo -i
cd /
/etc/init.d/virtuoso-opensource stop &&
tar -cvf - /var/lib/virtuoso | lzop > virtuoso-7.1.0-DBDUMP-$(date '+%F')-dbpedia-2015-04-en_de.tar.lzop &&
/etc/init.d/virtuoso-opensource start
Yay, done.
Tuesday, 5 January 2016
Install PyLearn2 - Deep learning tool
http://deeplearning.net/software/pylearn2/
Testing on Ubuntu 14.04
1. Install Python 2.7 (Anaconda framework)
2. Install dependencies for PyLearn2
$ sudo apt-get update
$ sudo apt-get install build-essential
(Some packages may have different version. use Tab to find the correct version)
$ sudo apt-get install libamd2.3.1 libblas3gf
$ sudo apt-get install libc6 libgcc1 libgfortran3 liblapack3gf libumfpack5.6.2 libstdc++6
(Most of them are existing in Anaconda framework)
$ sudo apt-get install gfortran libatlas-dev python2.7-dev
$ sudo apt-get install python-numpy python-scipy
$ sudo apt-get install python-setuptools git-core
$ sudo apt-get install libyaml-dev python-yaml
$ sudo apt-get install python-pip
(Dependencies)
$ sudo pip install --upgrade --no-deps git+git://github.com/Theano/Theano.git
$ sudo pip install git+git://github.com/lisa-lab/pylearn2.git
$ sudo apt-get install python-matplotlib python-scikits-learn
$ sudo pip install pandas
-------------------------------------------------------
Install Pylearn2 by Vagrant
https://github.com/ironchief/pylearn2_vagrant
Subscribe to:
Posts (Atom)
Do you see the same problem? ------ YES
this seems to be a problem with pyzmq. Do you know something about it?
and try again with
It works.